Tuesday, December 21, 2010

Jeans- How to fix the gap at the back


Measure the distance the waist band is gapping. You can pin jeans how you'd like them to fit at the waste and double the and measurement of the excess cloth.

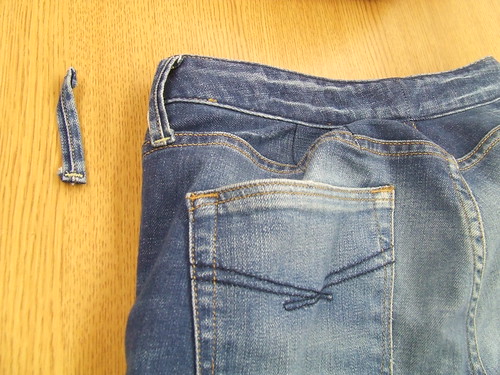
Take out the seam between the waistband and the yolk of the jeans at the back.

Separate inner and outer waistband. Make the new seam and adjustment of size at he back seam of waistband hidden by back center button loop. (see picture above) Sew the outer/inner band of the waistband and trim excess cloth. Then finish upper seam of waistband leaving the bottom seam open -to be sewn to yolk.

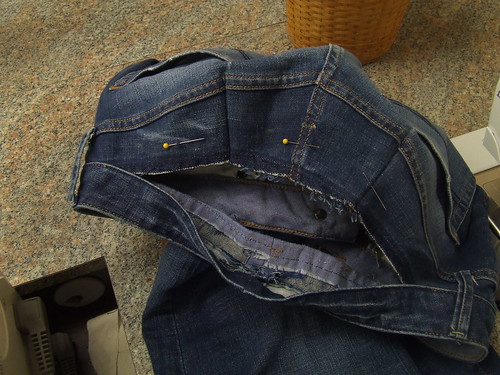
In the yolk, make darts so top of yolk will match measurement of the now smaller waistband.

Darts were placed at an even distance away from the center seam.

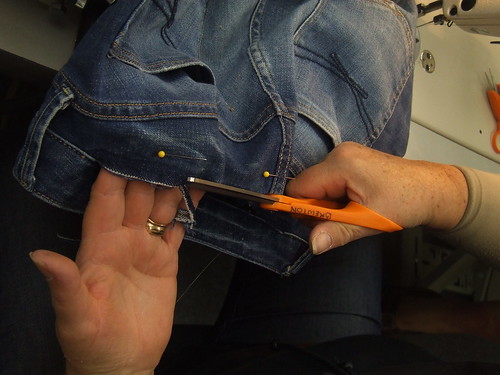
Try jeans on and mark where the waistband falls horizontally on the yolk. Leaving a seam allowance you can trim this fabric above the marking.


Insert the yolk into waistband and pin. Try on jeans to ensure fit. Stitch waistband.

Thursday, October 14, 2010

Upcycle to Reglan T Shirt Using Original Hems NO PATTERN

How to change your own T-Shirt to a raglan using original hems: No Pattern Needed!


*works best when starting with a larger sized t-shirt.*

  • Measure your BUST and WAIST. Add 2 inches to each for ease and seam allowance.
  • Below the armpits of the t-shirt, mark your Bust Measurement. At the bottom hem of the t-shirt mark your Hip Measurement.
  • Use a straight edged something draw the diagonal line from the bust mark to the hip mark.
  • Cut along this line:
  • Cut one sleeve off at the angle you want the raglan to fall. Fold shirt down the center front and cust the other sleeve to match.
  • You can use these sleeve portions as a pattern piece to cut out a contrasting color for the sleeve and back.


TIPS

If you are not using the original collar cut out AROUND the collar, not through the collar, you can us it to finish the shirt with or reserve this for your next t-shit project.

For knit fabric- stretch the fabric slightly while sewing it and use a zig-zag stitch.


More knit fabric sewing tips here.

Tuesday, October 12, 2010

Pin and Hem Lightweight Fabrics

Pinning dresses

Get someone else to pin you. Chopping it off evenly just wont work. Each person has different posture, and different body type that will make an even hem crooked. For example a pregnant lady is rounder in the front, someone else may be rounder in the back. So an "even" hem would be shorter in the front/back respectively for each person.

SO. After you choose your length measure from the floor up. pinning all the way around the dress at the desired distance. I measure at 19.5 inched from the floor.

Iron & Cut

Fold at the pins and iron around the fullness of the skirt right on top of the pins. This ironed crease is your Finishing line. Then cut away extra cloth leaving a few inches for the hem. DO NOT CUT ON THE FINISHING LINE

Sew

Following the line from the ironed finish line, pull the cloth back 1/8 inch. Sew at the edge, 1/8 inch from the finish line. (The pin is where the ironed finish line was)


Cut

Cut very close to this stitching line.


Fold this narrow hem over 1/8 inch and sew again on top of first stitches.


Admire your work. Say things like huzzah.

Saturday, October 02, 2010

Making an Etsy Banner

Free program here for creating a banner online.
And here's how: